Building a custom controller for Roblox gives you complete control over your hardware layout. Standard keyboards and generic gamepads often force your hands into awkward positions, which can slow down your reaction time in fast-paced games like The Strongest Battlegrounds or Blox Fruits. When you build your own setup piece by piece, you choose the exact switches, joystick tension, and button placement that fit your specific playstyle.
What parts do you need for a DIY Roblox controller?
You need a few core components to get started. The brain of the controller is a USB encoder board or PCB, which translates physical button presses into digital signals your computer understands. Popular choices include Zero Delay boards or Brook PCBs, and you can find specific mapping details in the Brook PCB documentation. You will also need a joystick, pushbuttons, quick-disconnect wires, and an enclosure material like wood, acrylic, or 3D-printed PLA.
For the buttons, most builders use 30mm arcade pushbuttons with microswitches. If you prefer a quieter or more tactile feel, you can swap the arcade buttons for mechanical keyboard switches mounted on a custom plate. The joystick can be a traditional levered stick for movement or a leverless setup using directional buttons, which many players prefer for precise dash mechanics in Roblox fighting games.
How do you assemble the enclosure and mount the hardware?
The enclosure holds everything together and needs to be sturdy enough to handle heavy button mashing. If you are using wood or acrylic, measure your components carefully and drill holes using a step bit or a Forstner bit to ensure clean edges. The standard hole size for most arcade buttons is 30mm, while joystick mounts usually require a specific routing pattern depending on the brand.
Mount the joystick first to ensure it sits flush with the top panel. Then, snap the buttons into their respective holes. If you want a more detailed visual walkthrough, checking out a full hardware assembly walkthrough can help you avoid misaligned drill holes and cracked panels.
How should you wire the buttons and joystick to the PCB?
Wiring is usually the most intimidating part for beginners, but it follows a simple logic. Every button and joystick direction has two pins: a signal pin and a ground pin. You will daisy-chain all the ground pins together using a single continuous wire that eventually connects to the ground terminal on your PCB. The signal pins each get their own individual wire running back to the corresponding input on the board.
Keep your wires organized by using zip ties or wire loom. If you decide to add extra inputs for complex menu navigation or streaming controls, learning how to properly manage complex wire harnesses for large button arrays will keep your build clean and prevent accidental disconnects.
Where is the best place to put your buttons for Roblox games?
Button placement dictates your comfort and execution speed. A standard Vewlix layout curves the buttons to match the natural arc of your fingers, which is great for general gaming. However, Roblox anime fighters often require rapid pressing of specific keys for combos or blocking. Placing your most-used action buttons directly under your index and middle fingers reduces travel distance and fatigue.
Different games require different setups, so taking the time to arrange your inputs for faster execution is just as important as the physical build. Test your layout in a private server before gluing or permanently mounting your buttons.
Can you add macros to a homemade fightstick?
Hardware macros let you bind multiple keystrokes to a single button press. This is highly useful in Roblox for automating repetitive tasks like auto-sprinting, executing complex emote combos, or handling inventory management. You can program these directly into the memory of advanced PCBs using their configuration software.
Many players use programmable boards to handle these repetitive tasks by assigning multi-input sequences to a single switch. Always check the specific terms of service for the Roblox experience you are playing, as some competitive games restrict the use of hardware macros for combat advantages.
What should you do if your custom controller stops responding?
Hardware issues happen, especially with DIY builds. If a specific button stops registering, the issue is almost always a loose quick-disconnect terminal or a faulty microswitch. Unplug the controller, open the enclosure, and gently tug on the wires connected to the problematic button to see if a terminal has slipped off.
If a specific input drops out during a match or multiple buttons fail at once, you will need to start testing the microswitches and ground daisy chains to find the fault. A broken ground wire will usually cause an entire row or cluster of buttons to stop working simultaneously.
Pre-build checklist for your first controller
- Map your keys first: Use a keyboard tester website to figure out exactly which keys you need for your main Roblox games before buying buttons.
- Buy spare microswitches: They are cheap and break easily during testing. Having spares prevents your build from stalling.
- Test before closing: Plug the PCB into your PC and test every single button in Windows Game Controller settings before screwing the enclosure shut.
- Label your PCB wires: Use a label maker or masking tape to mark which wire goes to which button. This saves hours of frustration if you need to troubleshoot later.
 Fix Your Diy Roblox Arcade Game Controller
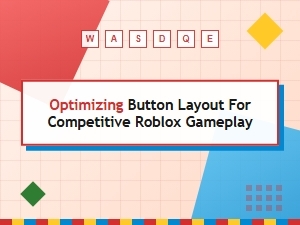 Roblox Button Layouts for Competitive Gaming
 Build a Custom 85-Button Roblox Controller for Pc
 Building a Roblox Fightstick with Custom Macros
 Roblox Controller 85 User Manual
 Official Roblox Controller Compatibility Guide